HubSpot Conversations is a free tool for live chat, chatbots, and team email that HubSpot launched last year.
It gives your sales, marketing, and customer services teams one place to manage all conversations with prospects, leads, and customers.
From emails to shared email aliases to messages to your website’s live chat inbox, you can manage and respond to everything from within the HubSpot Conversations inbox, but until recently, it still had several limits.
Fortunately, HubSpot has quietly rolled out some pretty big updates to the HubSpot Conversations tool, including consolidating the building and targeting tools into one place called chatflows.
This week, HubSpot released their first publicly announced product updates for Conversations since pushing the tool live in late 2018.
The three updates were regarding using attachments, the mobile-optimized chat widget, and updates to how email works in Conversations.
While mobile optimization for chat and updates to email are great, it’s the attachments piece that’s most interesting for users.
The Importance of Attachments in HubSpot Conversations
This update could easily slip in unnoticed, but it’s a huge improvement to the HubSpot Conversations toolset.
Prior to this update, you could not add images or files to a bot response in a conversation.
You could create anchor text that linked out to a file or landing page but could not place a file or image directly in a bot reply.
For anyone who uses texts or messengers regularly, you are likely used to this behavior. So, this limitation was quite frustrating.
Now, however, not only can you set up a bot to send a funny GIF or cute image of a puppy to your visitors -- you can use the attachment option to deliver content, such as a PDF guide or worksheet, directly to a visitor right within the conversation.
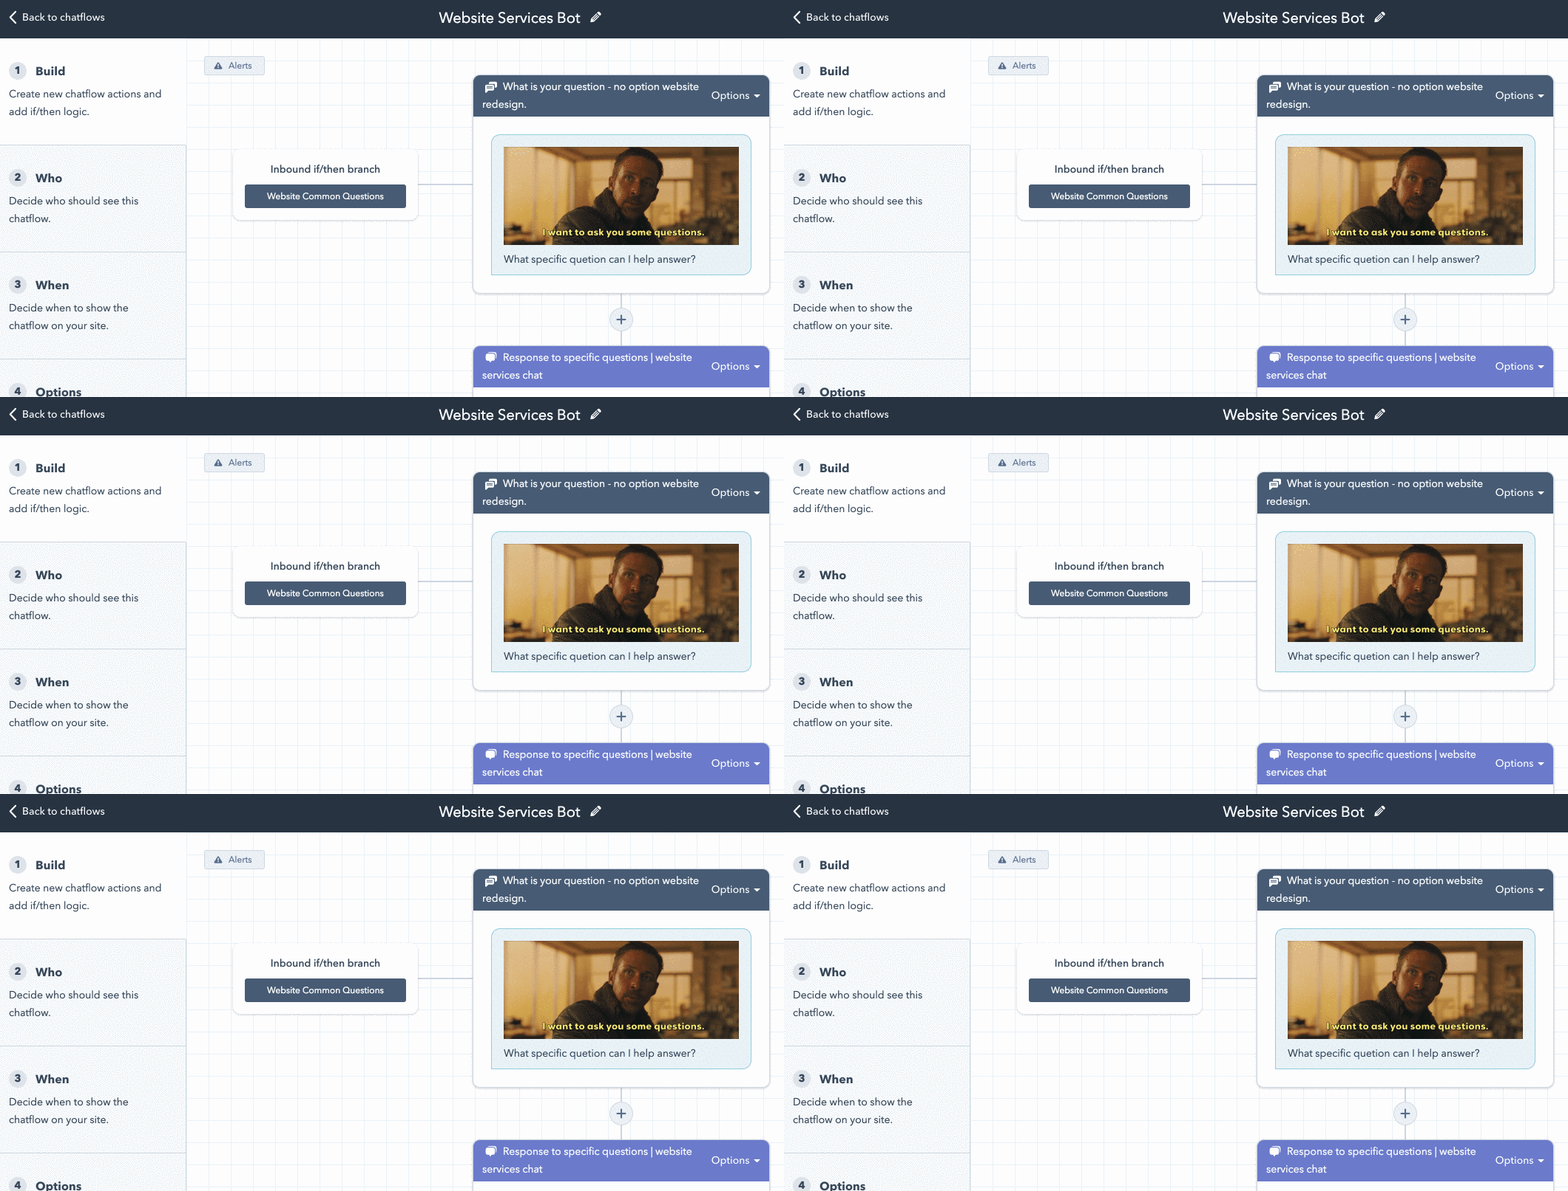
Delivering Content via Chatbot
The HubSpot Conversations tool allows you to build a bot that collects information during a chat and writes it to the contact record. You can even ask for and save someone’s email address to create a new contact. This means you can have them opt-in before delivering the content right within the bot conversation.
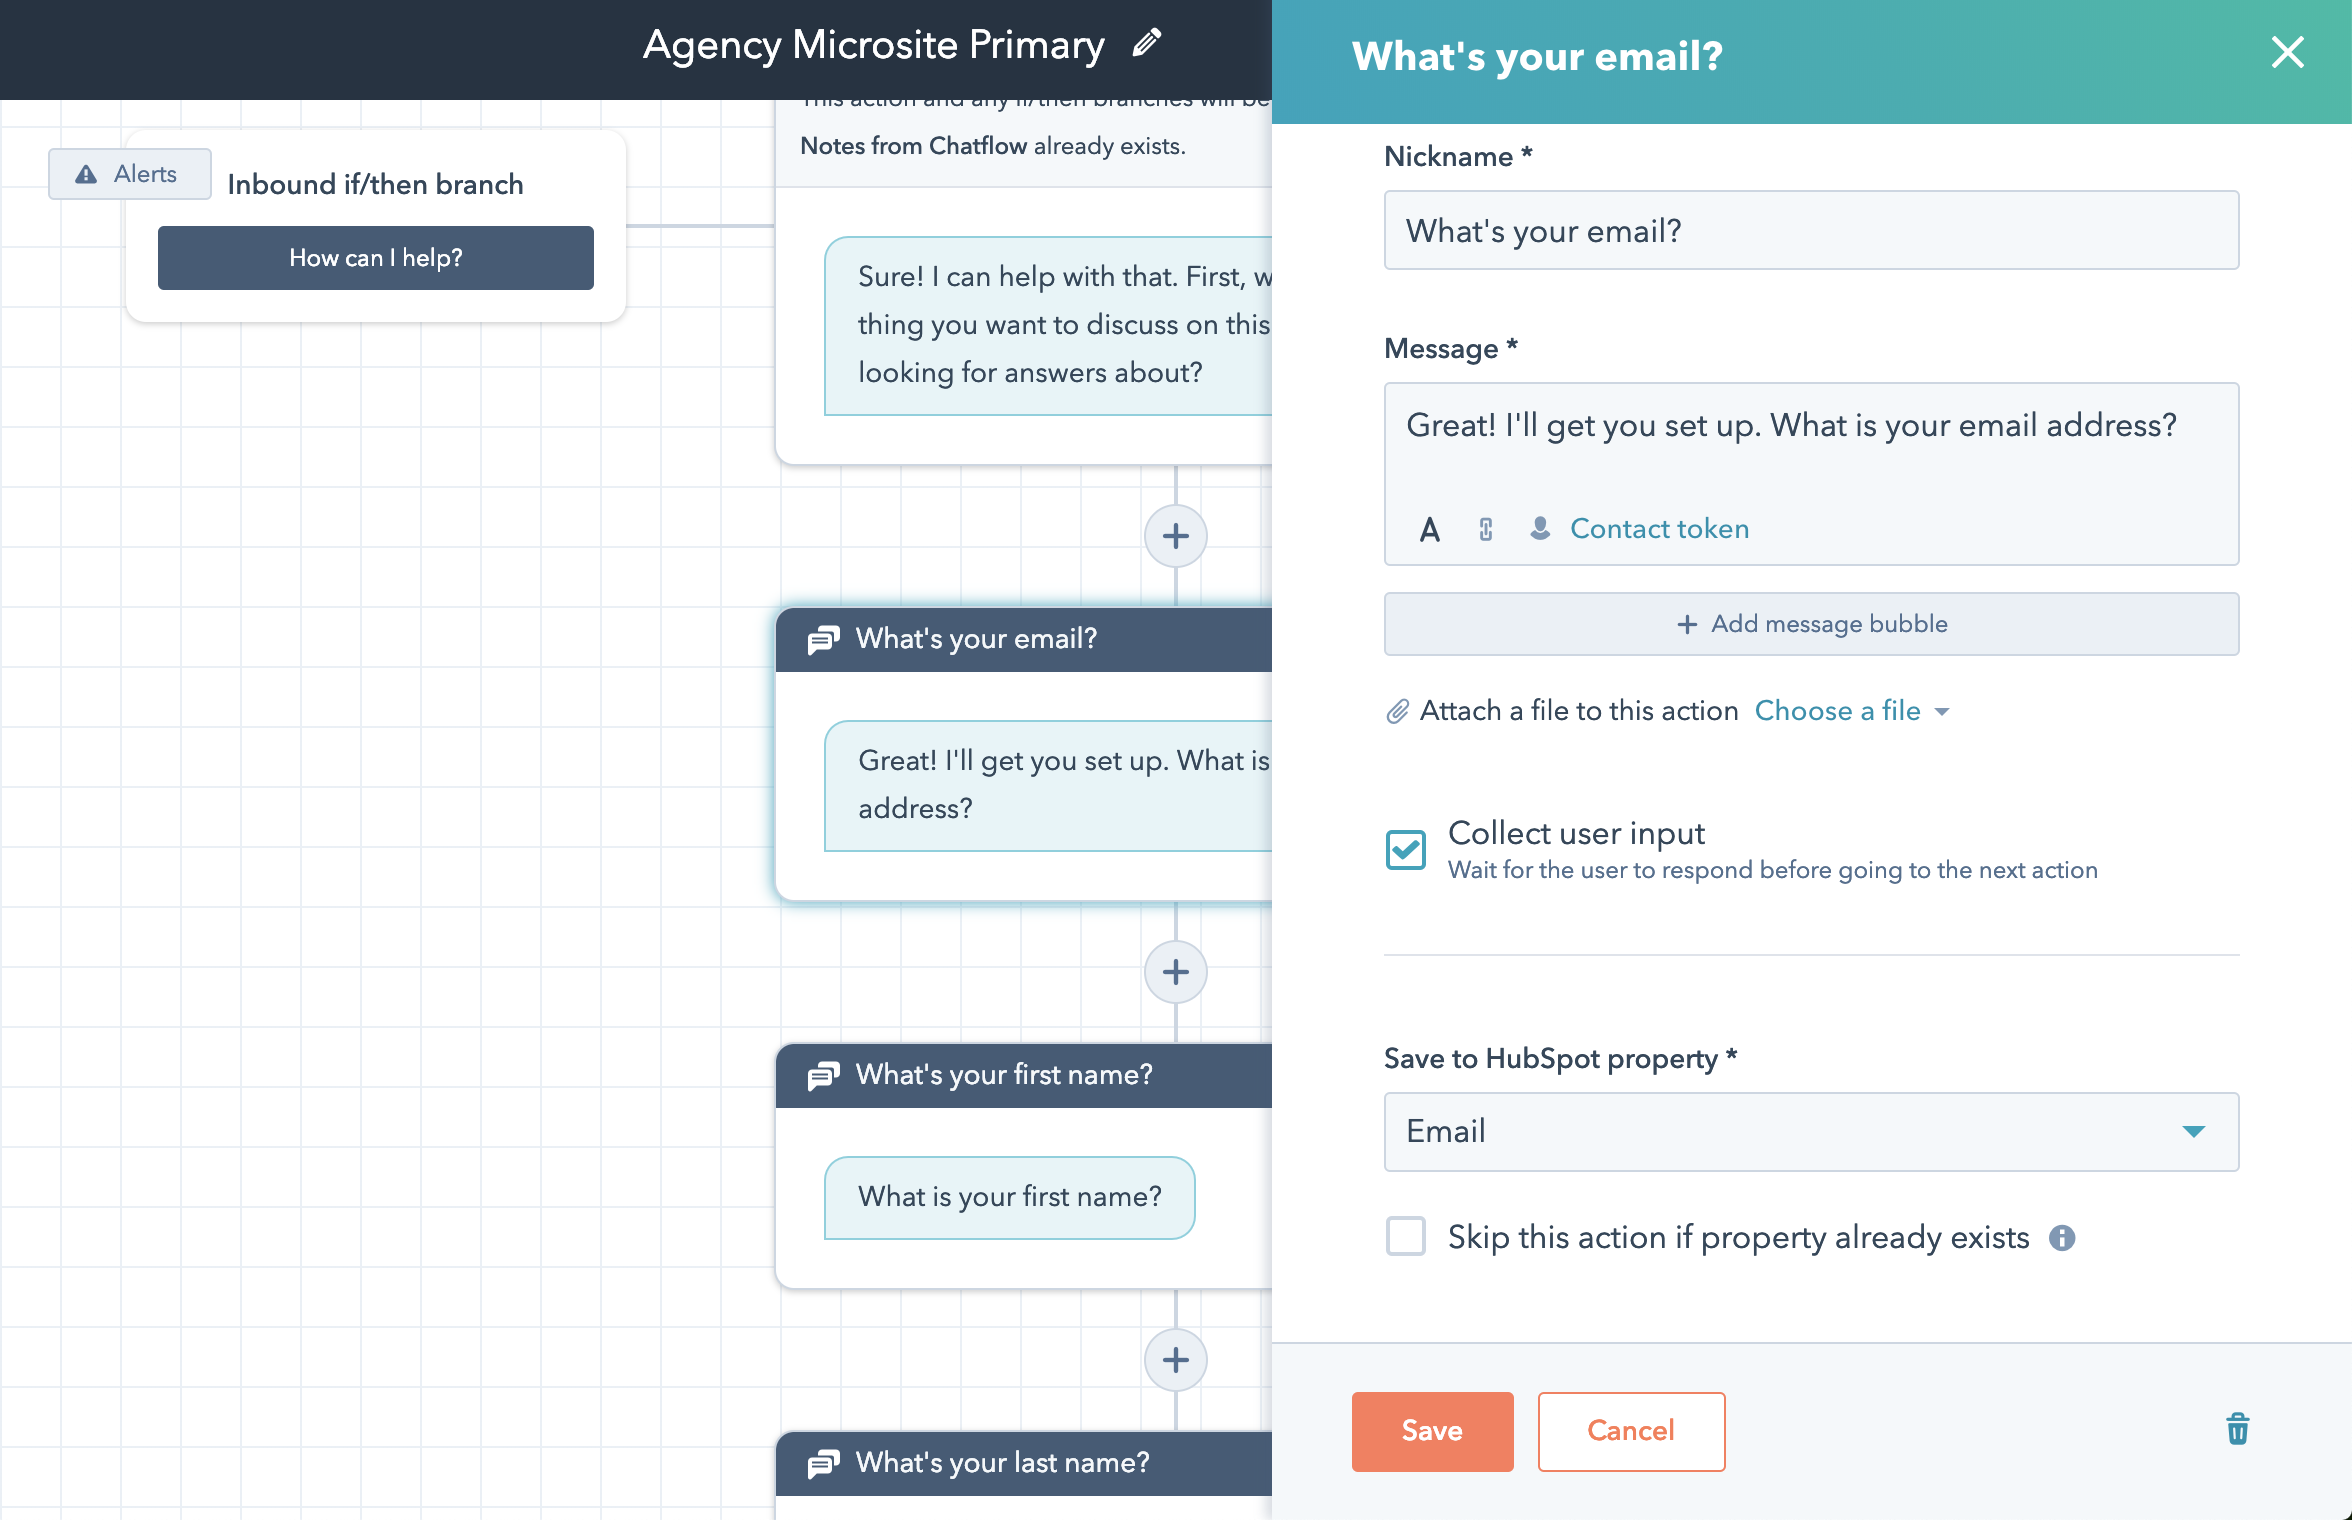
And don’t worry, it’s GDPR compliant as well. GDPR regulations apply any time you’re collecting and storing visitor data. It is not reserved specifically for landing pages with forms.
You can make sure your visitors have given you their consent to process and store their data and communicate with them before you ask for their contact information.
Following Up Post Content Delivery
After you’ve used your bot to deliver content in real-time, you can build a workflow that follows up via email based on this interaction.
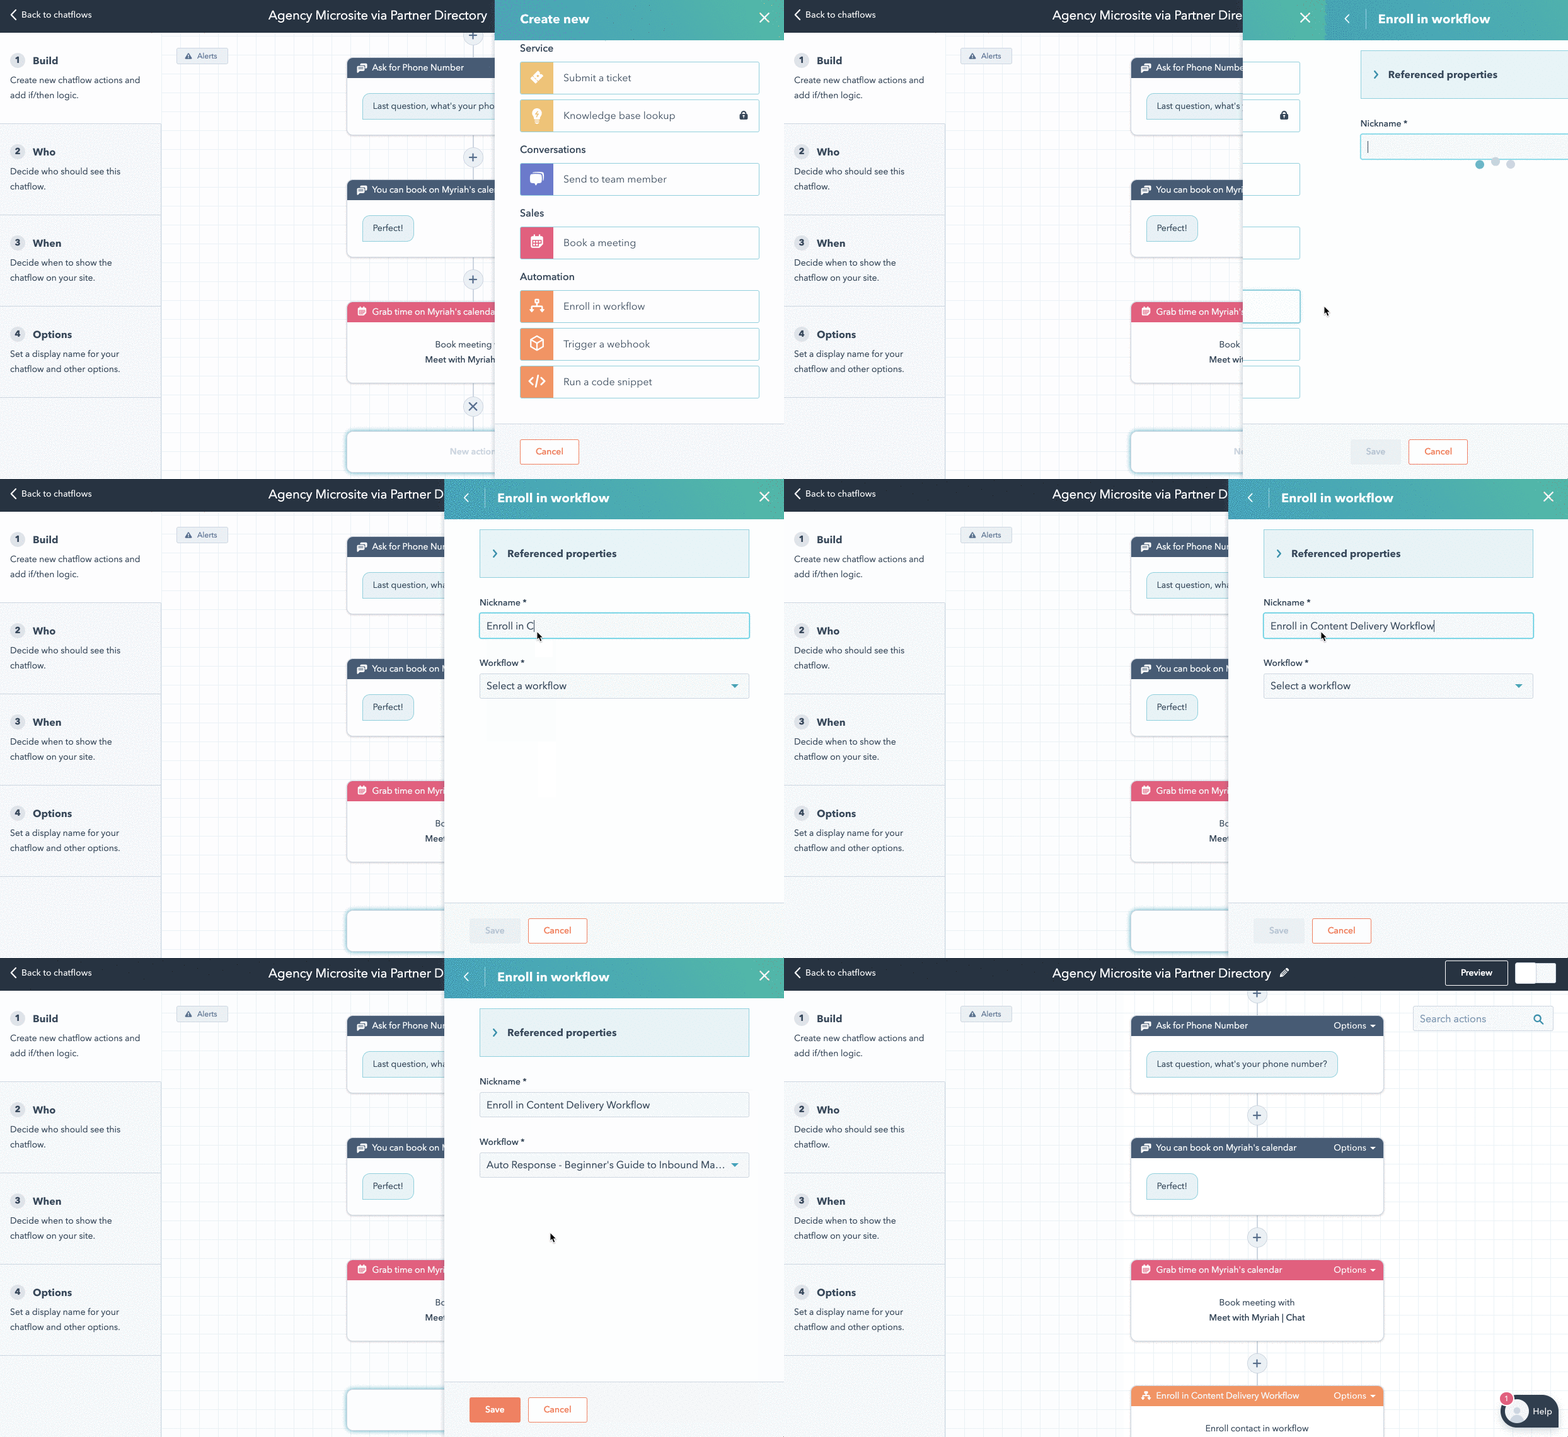
The ability to enroll a contact in a workflow via a chatflow isn’t new but using it in this way, after delivering content in the form of an attachment, is new and exciting.
Just remember to get consent and collect an email address first because if a contact record doesn't exist yet, this action will be skipped.
You can even have the bot suggest next steps or additional resources. Simply add an additional message from your bot after the attachment is sent.
This means you could potentially remove the need for a thank you page altogether. Or rather, you can accomplish everything you can with a thank you page without ever taking your visitor away from the content they’re enjoying.
Using Image and Animated GIF Attachments to Add Personality
Delivering content in real-time via a bot is exciting, but let’s not discount the power of sending images and GIFs as well.
A well-timed and appropriate animated GIF can add personality to your bot that helps keep visitors engaged. It can help better convey the voice and tone of your brand in a way that simple text cannot.
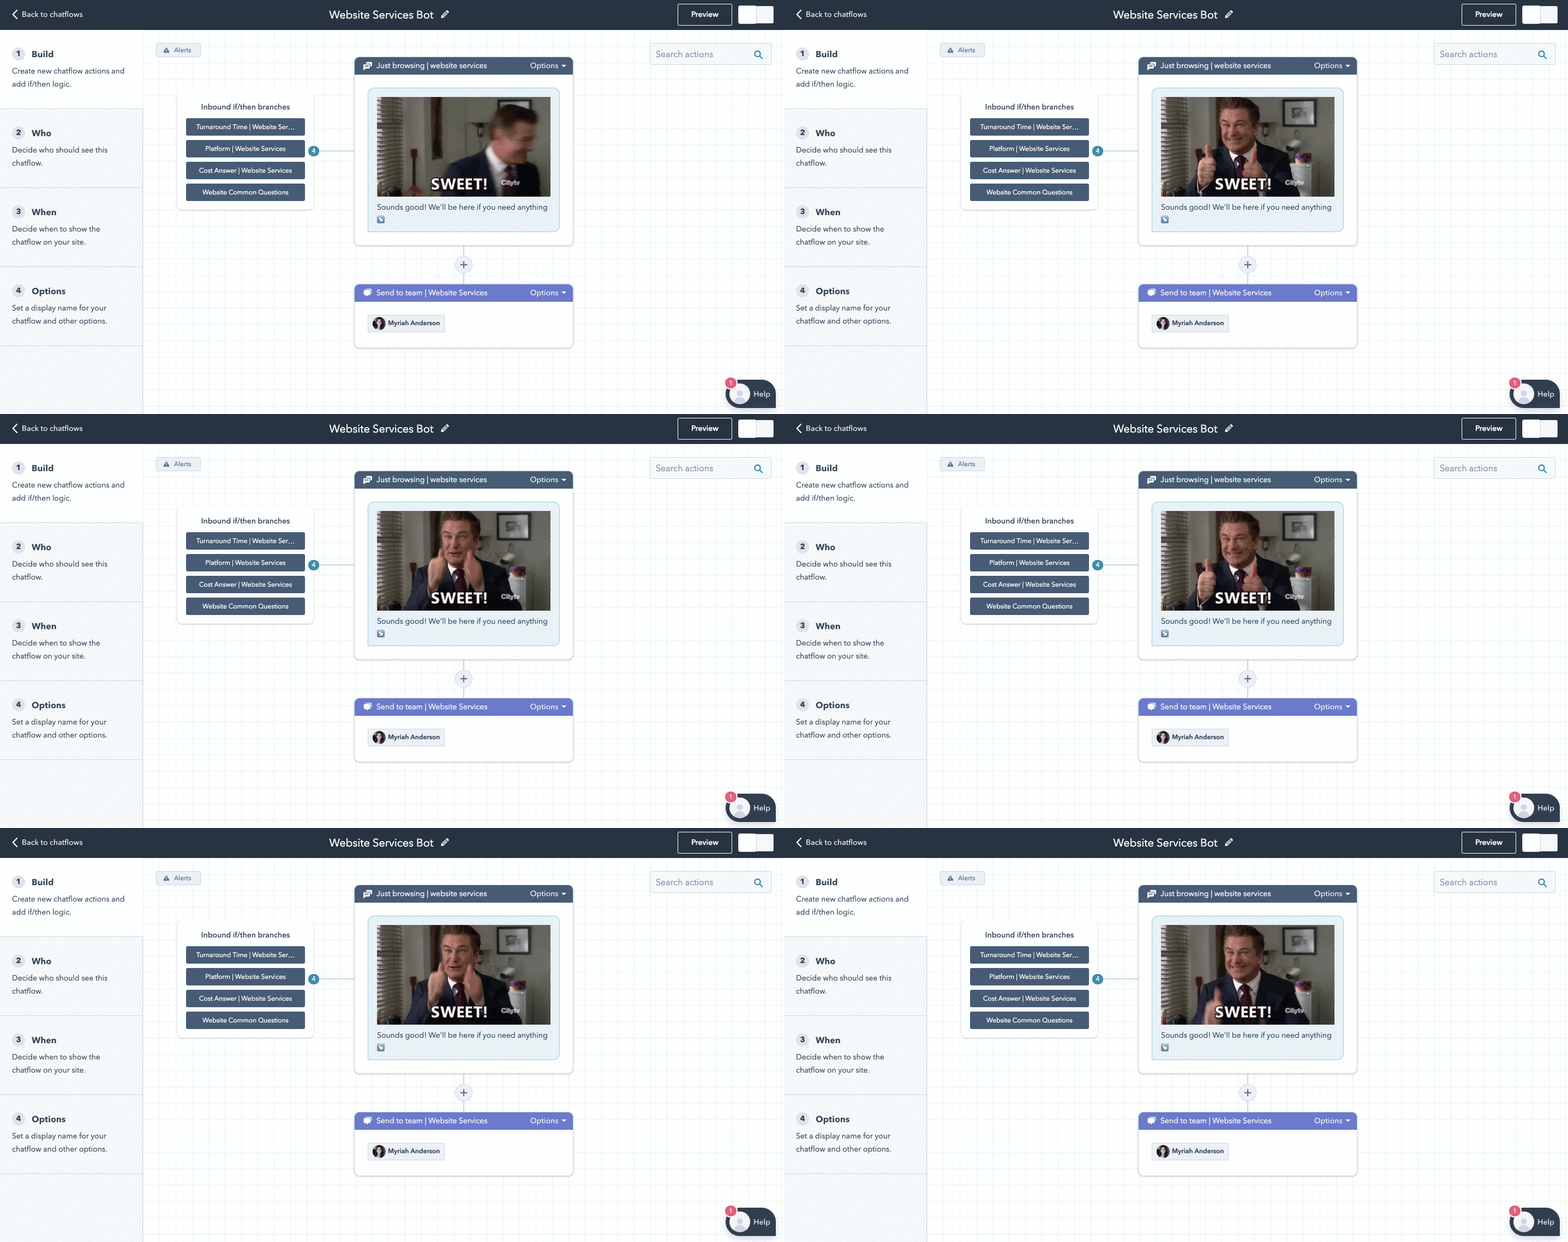
Plus, GIFs are not just for fun and games. You can create animated GIFs that show step-by-step instructions such as how to log into a user’s account or find something on a website.
How to Add Attachments to a Bot Reply in HubSpot Conversations
Adding an attachment to a bot reply in HubSpot Conversations is very easy.
Navigate to your chatflows and select the one you want to edit. Find the action where you want to add an attachment and click to edit the message.
Once you’re in the message section you’ll see the option to attach a file below the “add a message bubble” button.
When you click “choose a file” you’ll be able to upload a new file or choose an existing file from your HubSpot file manager.
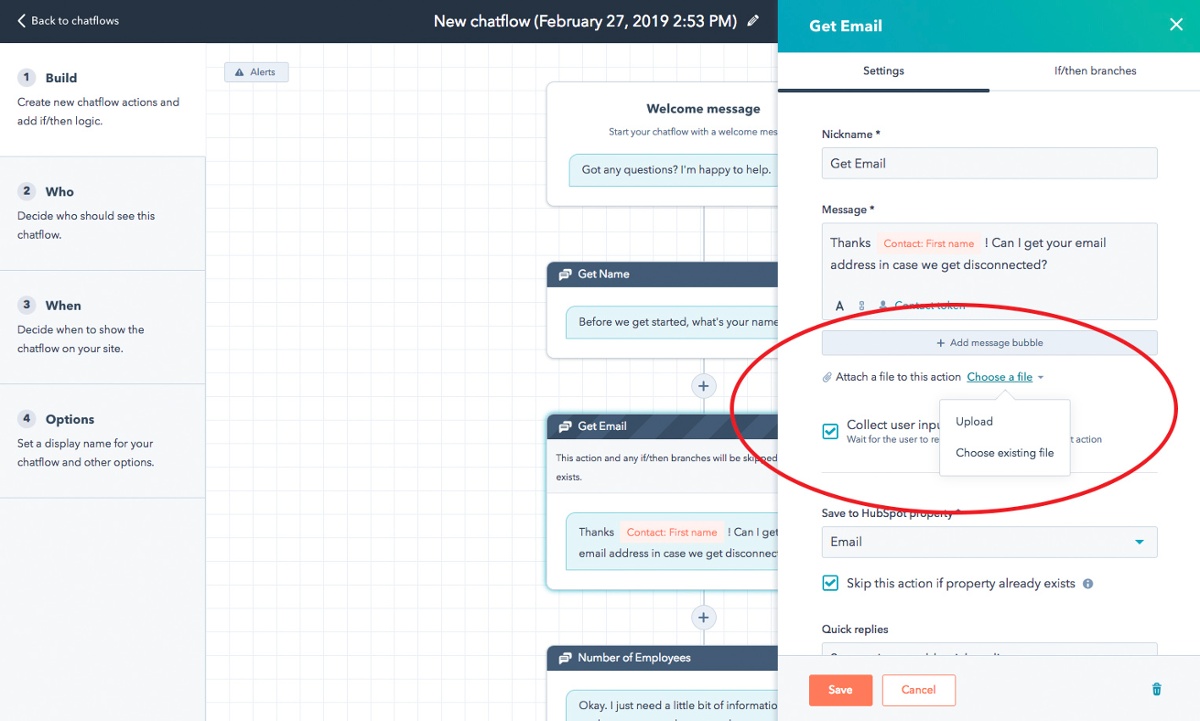
Image via HubSpot.com
The new attachments feature is definitely a V1 attempt and needs some improvement.
For instance, any attachment added will automatically populate at the top of the message. If you want content above the attachment, you’ll need to compose two back to back messages for your bot to send.
You also cannot add an attachment to your bot’s first message.
When you attach an image or animated GIF it will display the whole thing. However, a video or PDF file will still just show the filename and an attachment that will be opened in another window.
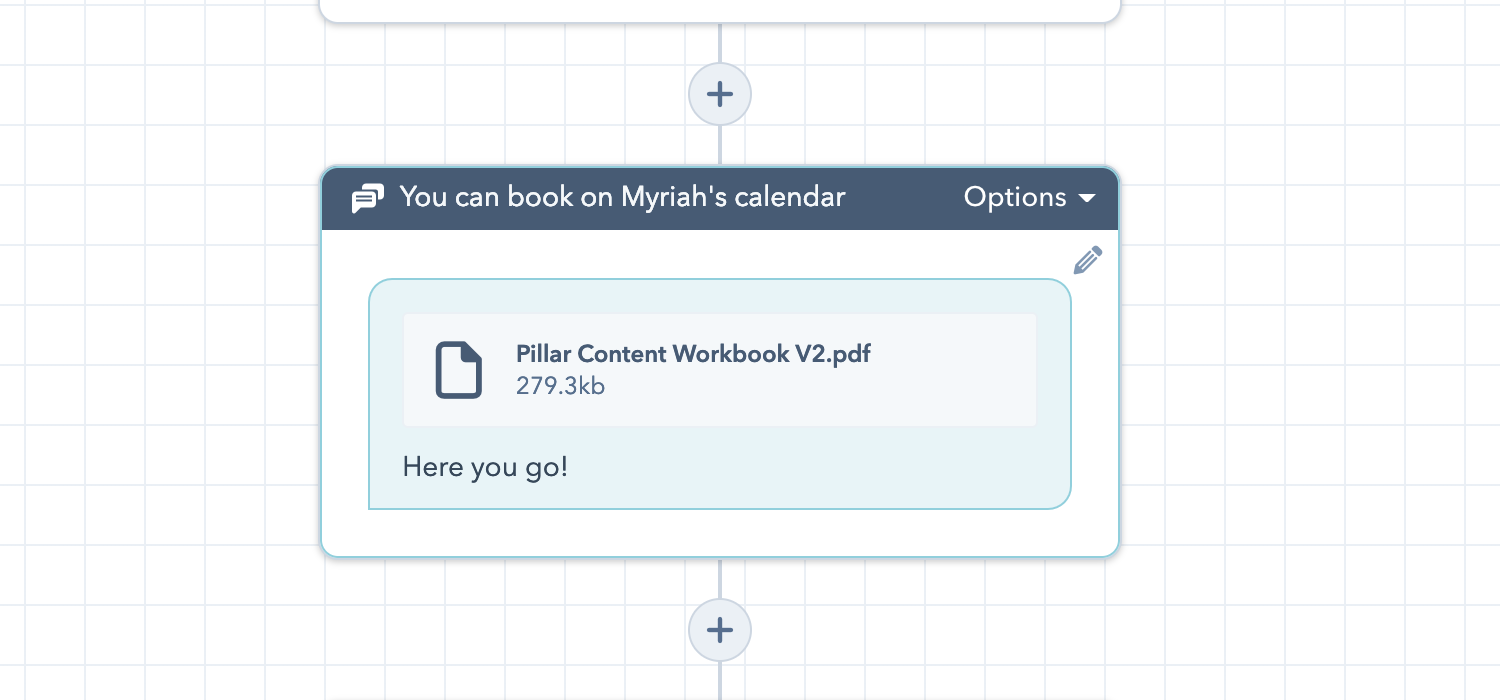
Videos cannot yet play in chatflows and you cannot link a preview image to a PDF. If you’re sending a PDF file via a bot you may want to stick to linking anchor text.
Otherwise, be sure to use your bot’s message to give clear directions on what the attachment is so your visitor knows what they’re getting.
Optimize Your HubSpot Conversations with Attachments
The attachment feature is now available in all portals with Conversations and the Conversations tool is free.
This means you can start adding personality to your bot replies with GIFs right away!
You can even start building flows to deliver content to visitors directly in a conversation. So, get to it!

Order Your Copy of Marcus Sheridan's New Book — Endless Customers!

