Subscribe now and get the latest podcast releases delivered straight to your inbox.
HubSpot has announced two new features that aim to help teams better manage chatbots on their website.
The updates came after feedback that the chatbots were passing conversations to agents who weren’t actually available to chat.
There’s nothing worse for a user than to initiate a conversation with a chatbot only to be left without a response by the person on the other side.
Not only is it just annoying to your visitors, but it can also cause them to lose trust in your customer service.
However, the chatbots passing conversations to unavailable agents was actually not an error of the tool itself, but rather, its reliance on agents manually toggling themselves to “offline” to indicate conversations shouldn’t be passed.
At a high level, this process makes sense — but because it’s such a small detail, it made it easy for agents to forget to go into HubSpot’s settings and shift to “offline” before going home for the day.
In order to ensure that visitors get the best experience, HubSpot built two additional “safeguards” into its Conversations system that should lower the risk of chatbots passing conversations to agents not currently online.
1. Customize when chatbots are displayed on the website
First, HubSpot has rolled out systems that allow site owners to control when they’d like chatbots to appear on the website.
Because all businesses have different preferences for how chatbots are used, there are two options to choose from. Both options are currently live and available to all HubSpot users.
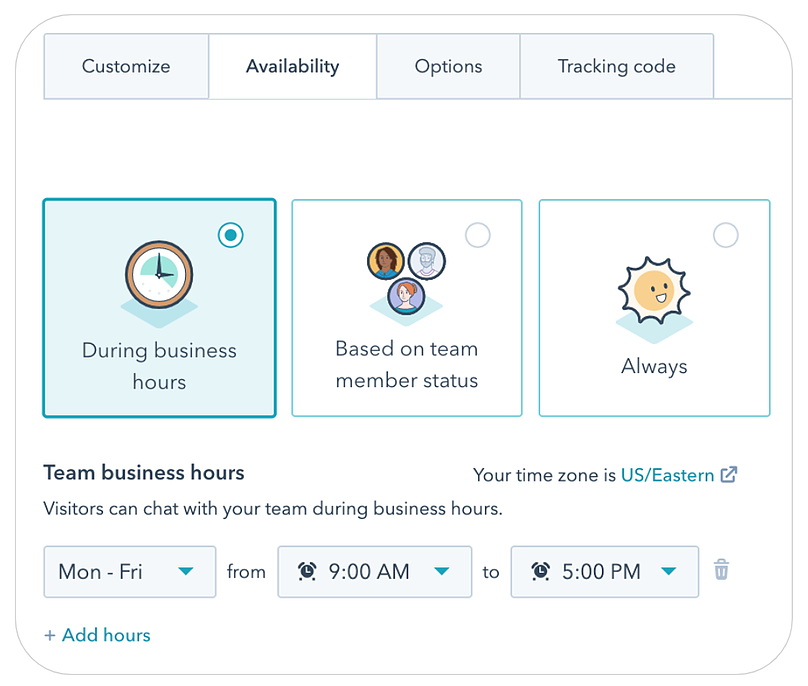
Display chatbots during business hours only
If your company’s primary use for chatbots is to help customers get their questions answered in real-time, you may want to turn chatbots off entirely when your team has gone home for the day.
This also saves you in the event one of your customer service agents has forgotten to toggle themselves as “offline,” as there’s no way for the conversation to be passed along to the agent mistakenly.
How to set this up in HubSpot:
- Navigate to “Chat Settings” within your conversations inbox
- Click the “Availability” tab
- Select “During business hours” option and use the drop-down feature to select the hours you’d like the chatbot to appear on your website.
 To finalize this, you’ll want to make sure to also indicate the same criteria for the appropriate chatflows. To do this, navigate to the chatflows that you would like to appear only during business hours and complete the following:
- Click “Edit”
- Select “Options”
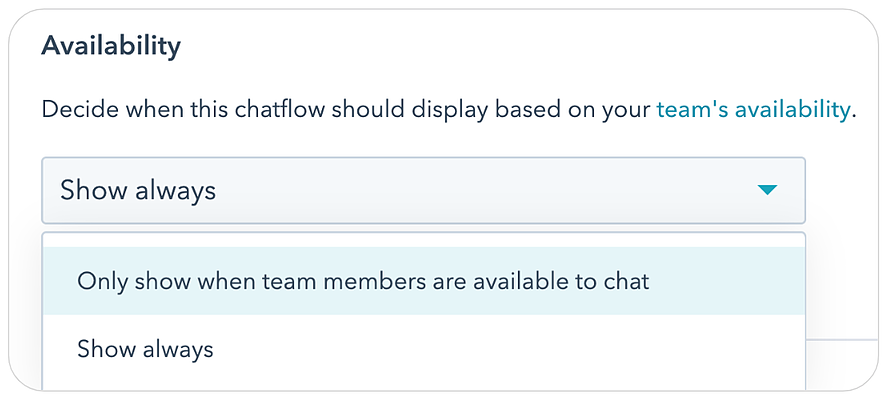
- Scroll down to the “Availability” section and select “Only show when team members are available to chat” in the drop down

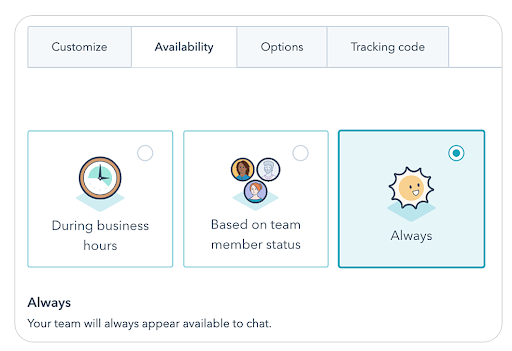
Always display chatbots
For teams that use chatbots as a way to collect new lead information, you can choose to keep chatbots online at all times, capturing leads and creating new help tickets for current customers.
This way, the bots can still collect and deliver the information to your team once they arrive back in the office.
To do this, you’d follow the same steps listed above, except you’d want to click “Always” on the availability tab of your inbox settings.

Still, even if your chatbot is displayed at all times, teams now have a little more control over what chatflows they’d like to keep on and when.
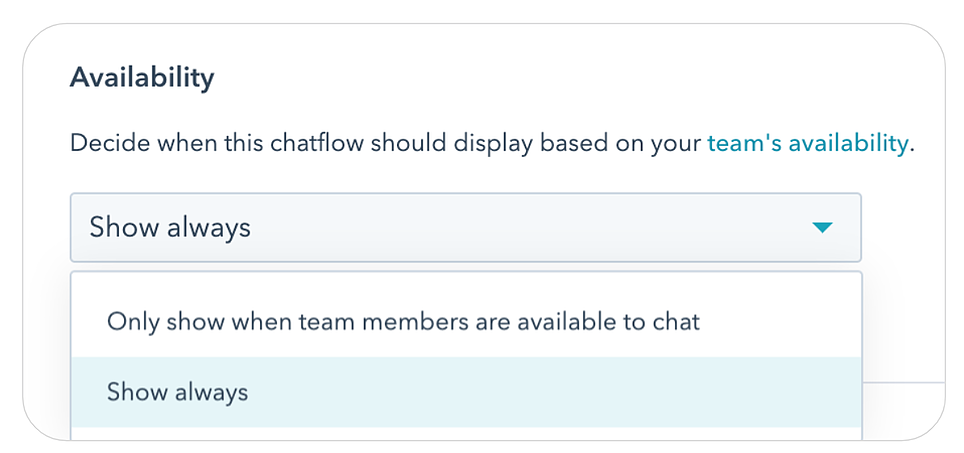
If you’d like to keep all chatflows on at all times regardless of team availability (i.e., keeping it the same as the old chatflow model), you’d simply select “Show always” in the availability options within the chatflow you’d like to keep on.
 However, if you’d like to select specific chatflows that will only stay on during business hours, select the first option to have the best of both worlds: your chatbot displayed on-site at all times, but avoiding the risk of a user being sent to an offline agent.
2. New if/then branches based on team availability
Second, HubSpot has created a new “if/then” branch type called “agent availability” that allows for an additional level of control.
Essentially, this branch type enables your team to route site visitors down specific paths based on specific agents' ability.
This works well for businesses who have agents working different schedules that require further customization than simply one set of business hours.
To set this up, navigate to your chatflow and complete the following steps:
- Click “Add new action”
- Under “Building blocks” click “If/then branch”
- Once added, set up the path you want the chatflow to follow based on agent availability
From there, you can select different scenarios of when you’d want the chatbot to pass a conversation to an agent, alternative agents if the first choice isn’t available, or other actions you’d like the system to take, such as getting an email, creating a ticket, or saving a message.
Hopefully these updates help businesses solve for the issues that prompted the feedback in the first place.


