Topics:
Lead GenerationSubscribe now and get the latest podcast releases delivered straight to your inbox.
Getting new blog subscribers from social media typically requires getting that person on your website first and then from there you need to convince them to sign up.
What if you could skip that step and generate leads directly within a social media platform? You can with Twitter Lead Generation Cards!
What Are Twitter Lead Generation Cards?
Lead Generation Cards are a specific type of Twitter Card (the platform's advertising tool) that allow users to fill out a form and share their contact information with you without ever leaving Twitter.
To illustrate, take a look at this example I encountered after following author and keynote speaker, Nir Eyal:
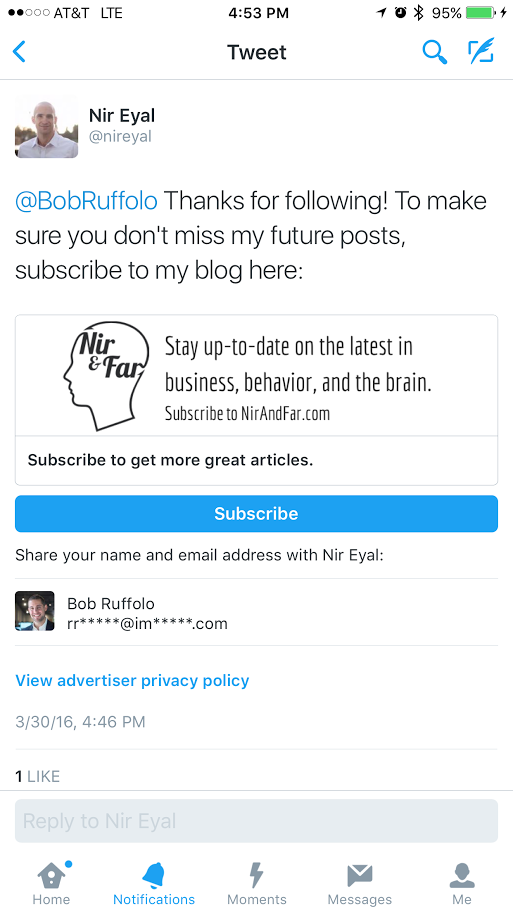
Since Twitter already had my name and email address, the Lead Generation Card form was auto-populated and in one click, I was subscribed to Nir's email list.
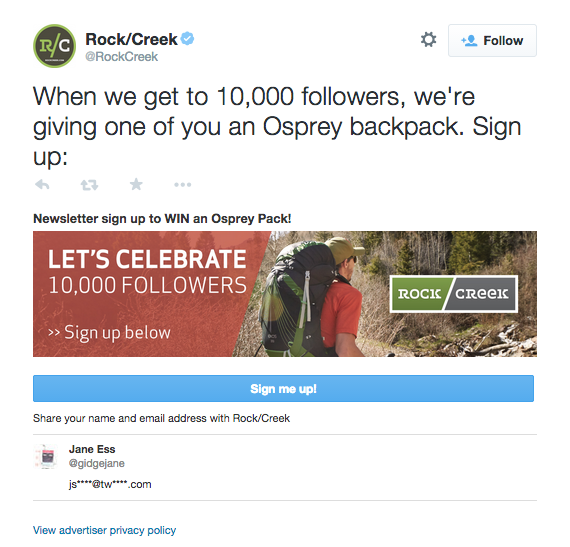
Besides blog subscribers, you can also use Lead Generation Cards to share an offer or even promote a contest. Here's another example from Rock/Creek:
Why Twitter Lead Generation Cards Work
In the spirit of conversion rate optimization, inbound marketers are always looking for ways to reduce friction in lead generation.
What's more friction-free than a single click of the mouse?
This simplicity, plus the native user experience, creates a path to conversion that feels organic, not forceful, in turn making users more likely to follow through with it.
Another reason we love Twitter Lead Generation Cards is that you don't even have to pay for them. You can simply create and attach your card to a normal tweet and hope your followers see them. If you want to go beyond organic exposure (reach new people), however, you will have to pay to promote them.
Twitter has stated:
"[Y]ou’ll never be charged for organic activity on Twitter. Take advantage of this by supplementing your paid lead generation campaigns with consistent Tweets that engage your followers."
Regarding paid campaigns, you aren't charged when someone views or clicks on the Lead Generation Card. Rather, you only pay when someone converts, on a cost-per-lead basis.
How to Set Up a Twitter Lead Generation Card
Before you try to set up a Lead Generation Card, you have to create a Twitter Advertising account. This will add "Twitter Ads" to your account settings.
(You must live in the United States, Canada, or the UK to do this. Learn more about that here.)
Once you have your account, follow these steps:
Step 1: Create a Leads Campaign
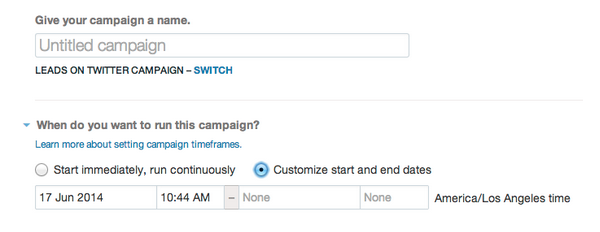
Access your Twitter Ads account and create a new Leads on Twitter campaign.
Give your campaign a relevant name and then select the start and end dates for your campaign, or choose to run your campaign continuously.
Step 2: Create Your Card
You can choose to add your Lead Generation Card to a new Tweet or to an existing one.
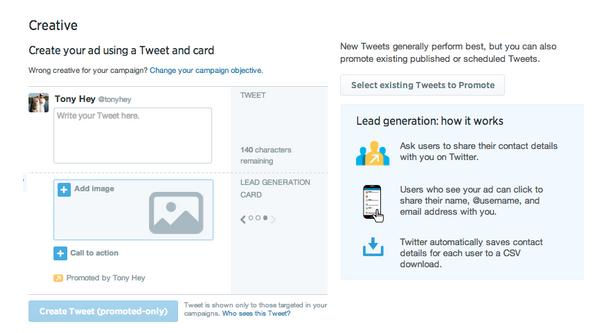
No matter which you choose, make sure to use an eye-catching image that's relevant to your call-to-action and doesn't contain distracting text. According to Twitter's guidelines, it should be 800 pixels wide by 200 pixels high and the maximum image size is 3MB.
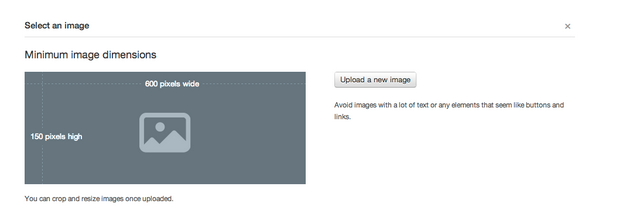
Next, you're going to write the description of the offer at hand. This appears below your card button and tells people what they'll be getting in return for their click. You're limited to 50 characters here, so keep it concise and descriptive.

Note: Remember to keep your call-to-action action/benefit-oriented and engaging. (Think more "Get Your Free Copy" instead of "Download Now," but you can learn more about that here.)
Last, but not least, since you're collecting user data, Twitter then requires you to include a link to your privacy policy as well as a "fallback webpage."
Simply put, the fallback is the alternative landing page or other URL where people can go to receive the offer you're promoting if their device or browser is not compatible. In the event where a user is accessing Twitter from a third-party app that doesn't allow a one-click signup, this link will help keep the reader on the hook and prevent you from losing the lead.
And that's it!
Once you've created and launched your Lead Generation Card using the steps above, you can start adding it to your normal tweets or promoting it through the platform.
From there, you can download your leads in a CSV from your Twitter Ads account or you can set up your incoming leads to be instantly updated into several CRM systems including:
Unfortunately, as you can see, HubSpot doesn't current have an integration for Twitter Cards, but the solution is simple. Check out this article to learn how to align your Twitter card with a HubSpot form and have your leads automatically dropped in your CRM!
Automate Card Tweets with Zapier
Rather than promoting the card manually through your account, you have the ability to use Zapier to send tweets with the card automatically. These tweets can be personalised using the new followers username and will be sent out each time someone new followers your account.
This gives you the ability to specifically target your new followers with your card rather than hoping these people see it in your regular tweets.
While this may sound like a task you'd give to your tech expert, Zapier makes the integration much easier than you'd think. The application goes through each part step-by-step so you aren't overwhelmed. It even gives you the option to test at certain points to make sure your setup is working.
How Zapier Works
Before you try to set up your integration, you will need to set up a Zapier account. We suggest a basic plan for this tutorial, but for testing purposes, a free plan will work fine temporarily.
Each plan gives you a certain amount of ‘Zaps' which is a connection between two or more apps that automate your task. Zaps contain a ‘trigger' (ex.: For every new follower on my Twitter account...) and an ‘action' (ex.: ...add them to a Twitter list). Your Zap's will manage your data automatically so long as they are turned ‘on'.
Each Zap also has a limited amount of ‘Tasks' that can be used. Tasks are counted each time an action is performed. So if your integration has an action that creates a new GotoWebinar registrant, then one task will be used up each time a registrant is made.
For this example, we will only be using one Zap, but a number of tasks can vary depending on the amount of followers your Twitter account receives.
How to Set Up a Twitter Integration with Zapier
After you sign up for a Zapier account you can begin to set up your Zap. To start, select the Twitter icon from the application options and then "Add new Twitter Followers to a list" from the Zap options below.
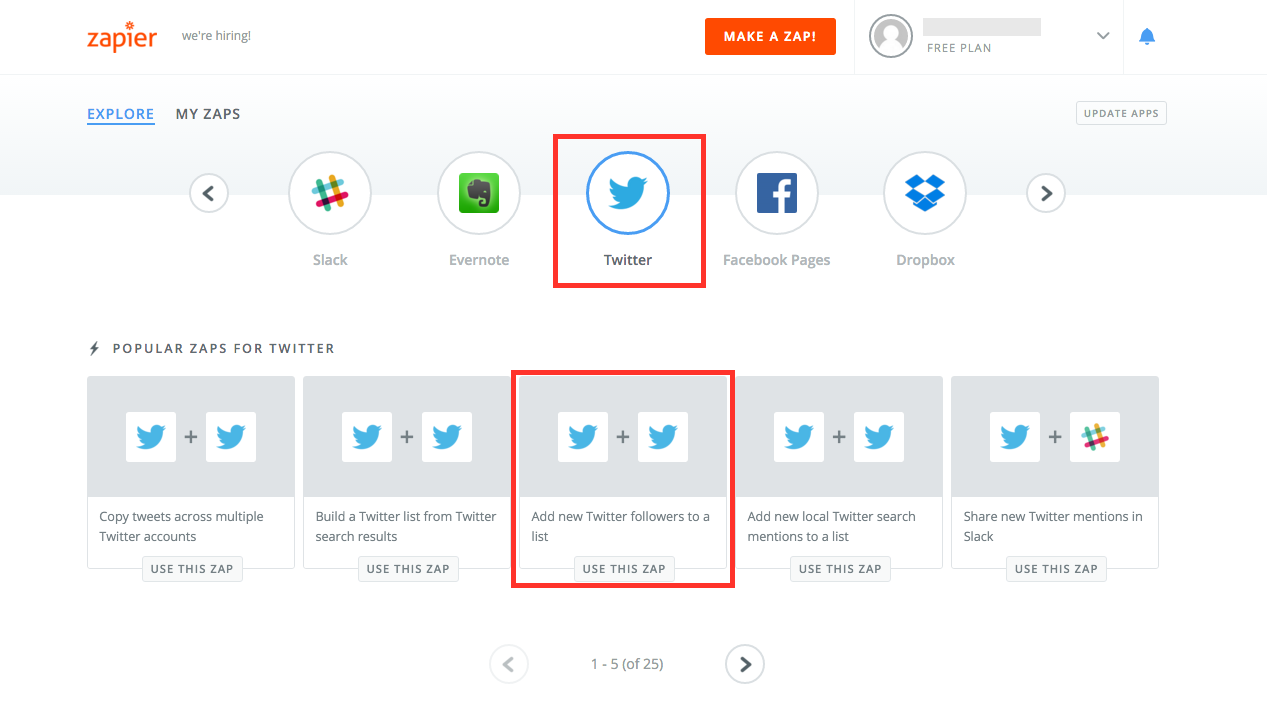
Zapier will ask you to verify if the integration you chose is correct. Once you confirm that it is, you can continue on to the next step and choose/connect a Twitter account to the Zap.
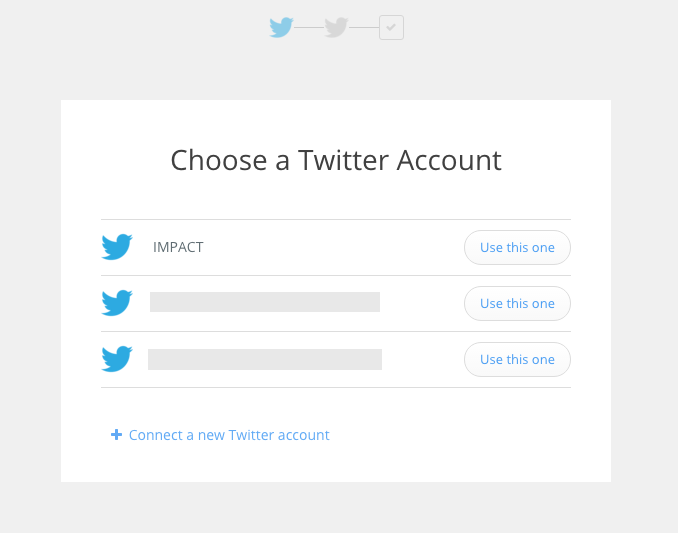
Next, you will need the username that will be watching for your new followers (most likely the Twitter account you are using for the Zap). As well as the Twitter account you will be using one again.
After you verify this step, you will of successfully created the trigger. Now we can create the first action.
Here, you will need to select a list you want users to be added to and the screen name of the user you want to add to that list.
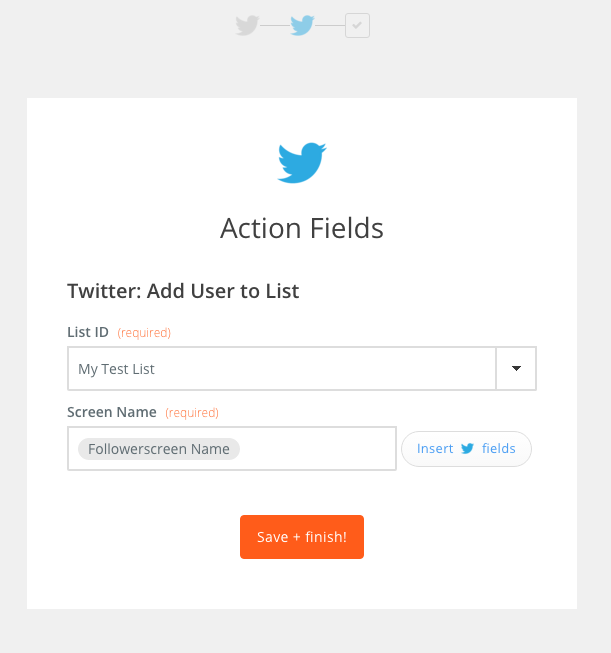
Once this is completed, you can test the action for yourself. To do so, you will need to follow the Twitter account using an account who has never followed you before. One they follow you, you can verify the action has occurred within Zapier.
Now that we have captured the new followers in a list, we need to create another action; the tweet they will receive.
In the sidebar, click the large ‘+' icon and select Twitter under ‘Your Apps'.
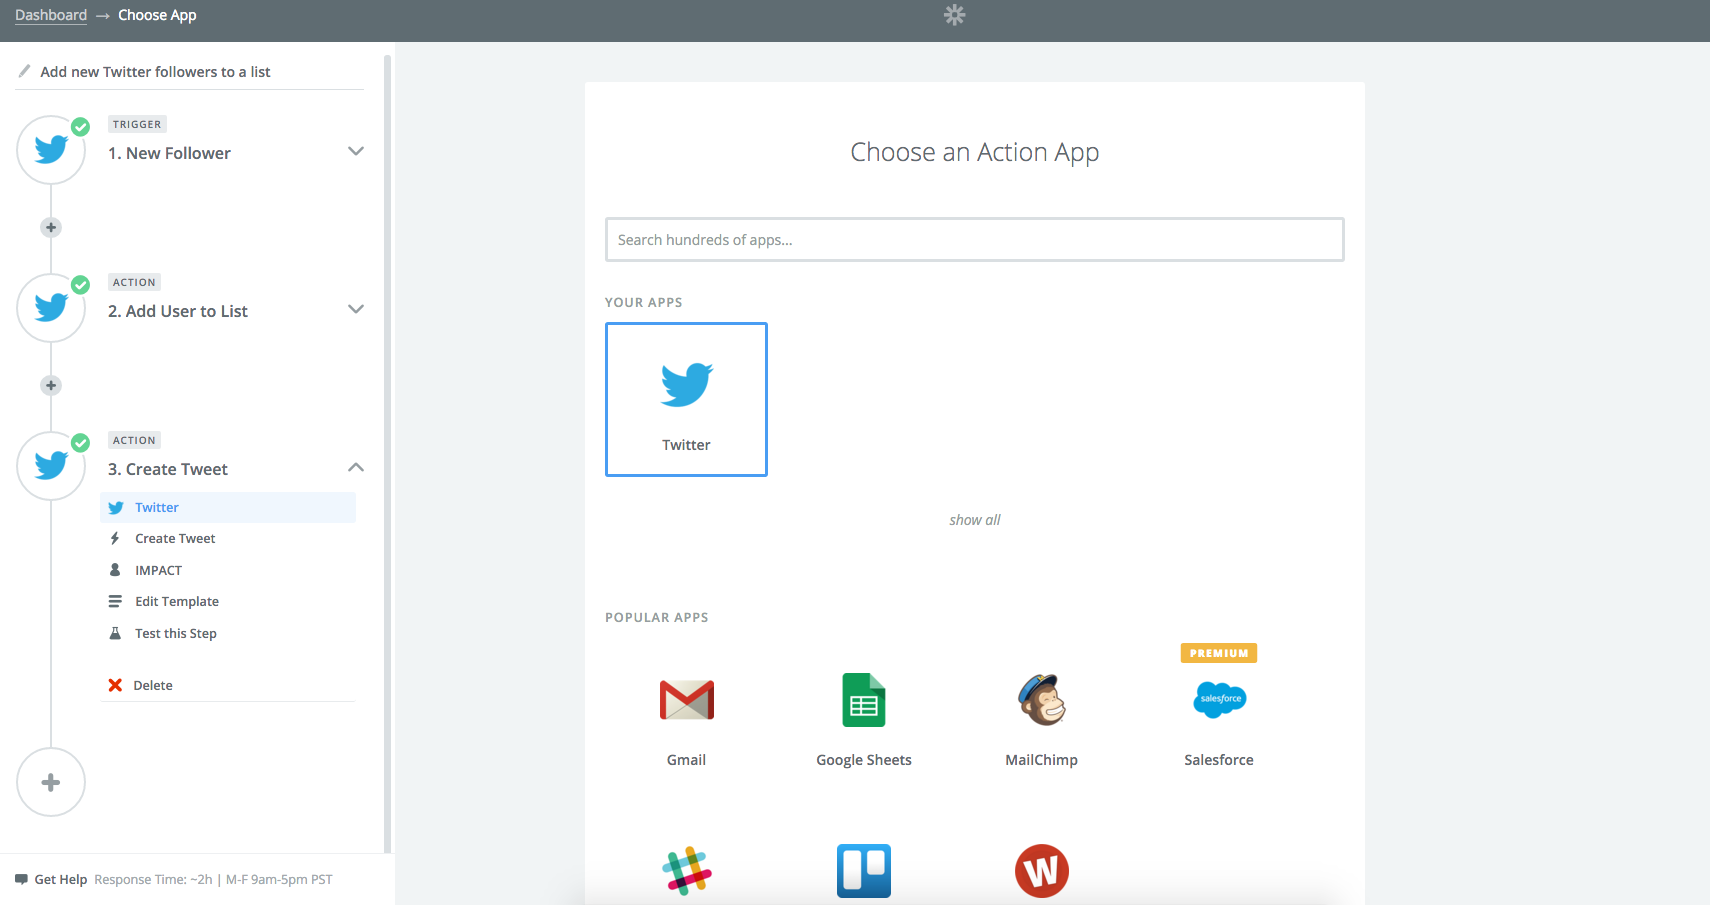
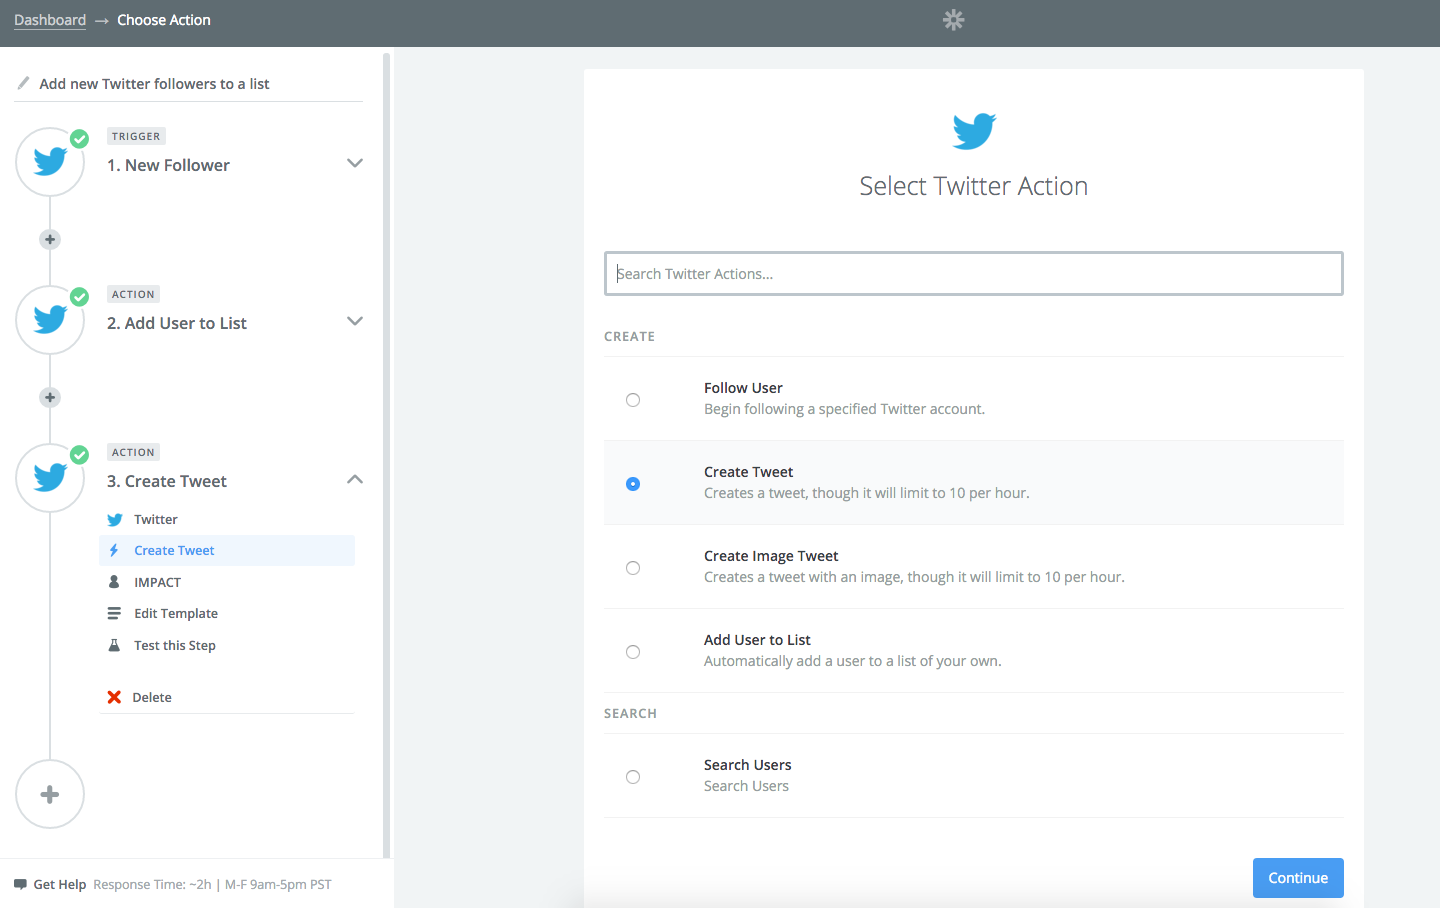
For the action, select "Create Tweet" under the "Create" List. This will be the tweet that's sent out each time someone follows your account. It's important to note that the Zapier limits your tweets to 10 per hour to control any spamming that may occur.
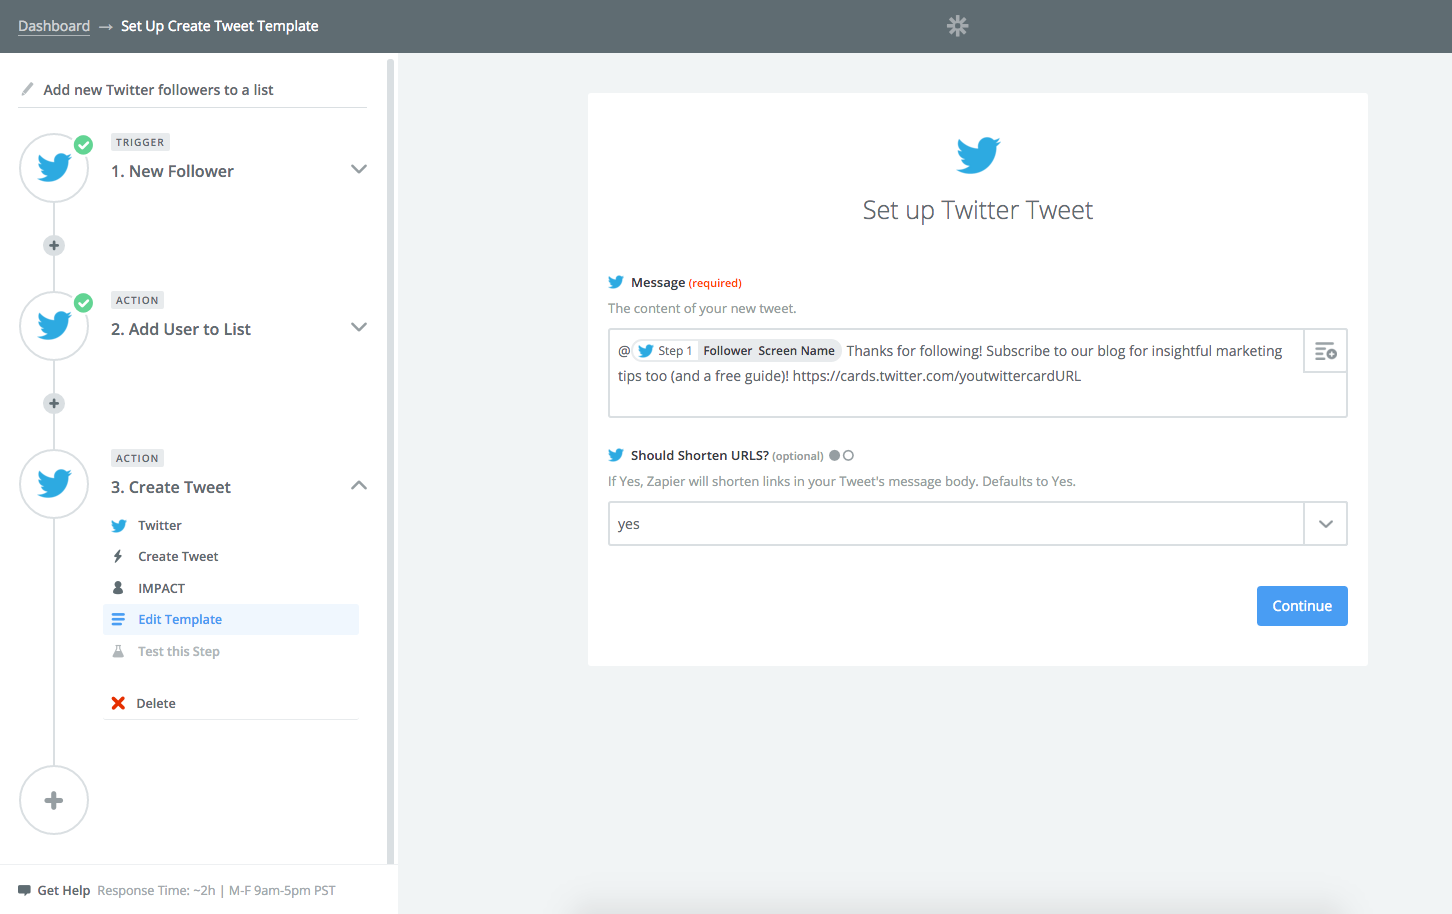
After, you will need to select the account you will be sending the tweet from and then continue on to create the tweet itself. Here you can target your new follower and attach your Twitter card URL.
Finally, you can test your tweet using the same username for the follower used in the first test. To see it in action, head over to your Twitter feed and navigate to "Tweets & replies" to find you test tweet.
Once you see it working, all that's left to do is to finish the action and turn your Zap ‘On'. When it's activated, the zap will check your list every 15 minutes for new followers and send out your tweet!


Order Your Copy of Marcus Sheridan's New Book — Endless Customers!

